-

-
ElemixVersion 1.0.0
General Information back to top
- Created: 7/6/2020
- Author: Pixelshow
- Email: pixelshow.tf@gmail.com
Thank you for purchasing our Theme! We hope you will find answers to all your questions regarding Elemix answered in this Documentation as much in details as possible. However, if you still need support, do not hesitate to contact us. We will appreciate, if you find a few seconds and rate our Theme. Many thanks!
To install this theme you must have a working version of WordPress. If you are new to WordPress, we highly recommend you to read through some beginner tutorials first.
Technical Requirements
To install this theme you need to have a working version of WordPress. Please refer to WordPress documentation for further instructions. You can download the latest version of WordPress here.
- PHP 5.4 or higher
- MySQL 5.5 or higher
- Apache mod_rewrite module must be enabled
Besides the recommended server requirements for WordPress, make sure your PHP memory for WordPress is set to 128MB. You can read more about changing the PHP memory in WordPress codex.
This theme is tested under Mac, Windows
Compatible Browsers: Firefox, Safari, Chrome, Opera
Theme Uploadback to top
Once you've downloaded the installation file on ThemeForest, extract it and locate a file called elemix.zip. You can install the theme by using one of two installation methods:
- WordPress upload - This is probably the simplest way for most users. Here are the steps you need to take:
- Login to WordPress admin
- Go to admin panel > Appearance > Themes > Add New > Upload Theme
- Click on "Choose File" and select elemix.zip
- Click on "Install Now"
- FTP upload - If you wish to install via FTP, here are the steps you need to take:
- Using FTP client, login to the server where your WordPress website is hosted
- Using FTP client, navigate to the /wp-content/themes/ directory under your WordPress website's root directory
- Using FTP client, upload the Elemix directory to themes directory on remote server.
Plugins Installationback to top
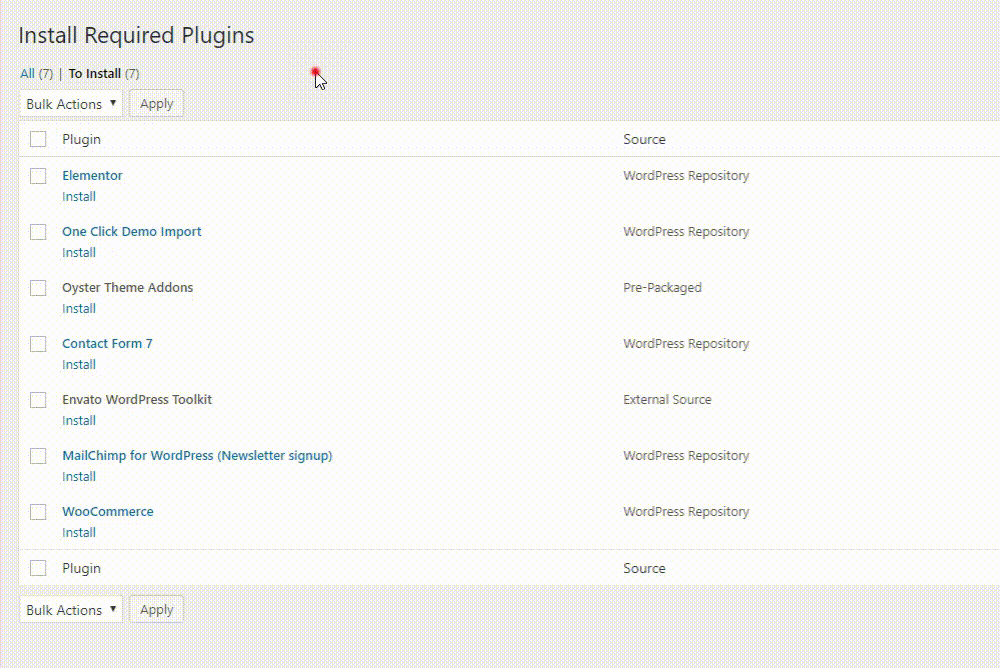
After you Activate this theme you will see message in WP admin panel that you must install required plugins and can install recommended plugins. Don't worry - all plugins included with theme and you don't need to purchase something.

- Click Begin installing plugins in this message
- You must check all required plugins and can check recommended plugins (we recommend it to use, but theme will work without this plugins too):
- Select Install in dropdown Bulk Actions menu and click Apply
- You should get All installations have been completed message with installed Plugins table below it
- If you need Shop Features you can install WooCommerce plugin (go to Plugins and search for WooCommerce).
Update Themeback to top
Manual update
When new update will be released, the ThemeForest will notify you about that so you can download new package and install it manually. We don't recommend this approach. The more robust way is to use automatic updates.
Automatic update
To use automatic updates you need the Envato WordPress Toolkit plugin. If you haven't installed it yet, you can do that now via WordPress Admin › Appearance › Install Plugins panel.
For more information about its configuration, please read the Envato WordPress Toolkit Guide For Automatic Theme Updates.
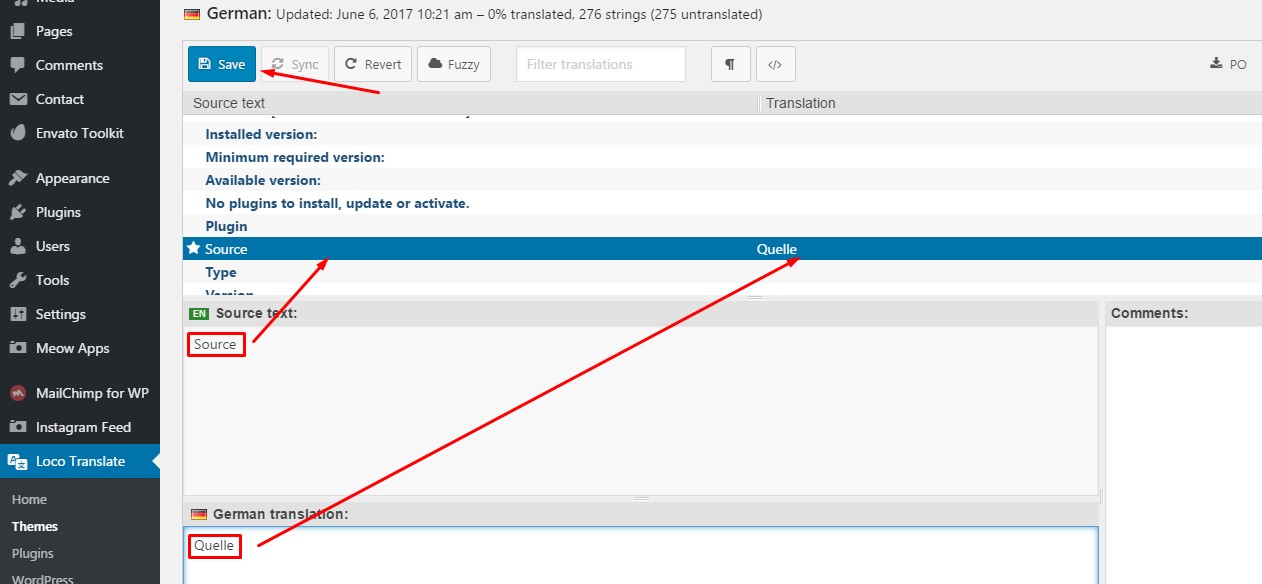
Theme Translation back to top
There are many ways for translating themes and plugins. We recommend translating
WordPress themes and plugins with Loco Translate plugin. It allows having all necessary
tools right in your WordPress without switching to any other external programs.
If you
don’t want or can’t provide access to your admin panel to other editors you can use online alternative of "Loco Translate" plugin.
Translation steps:
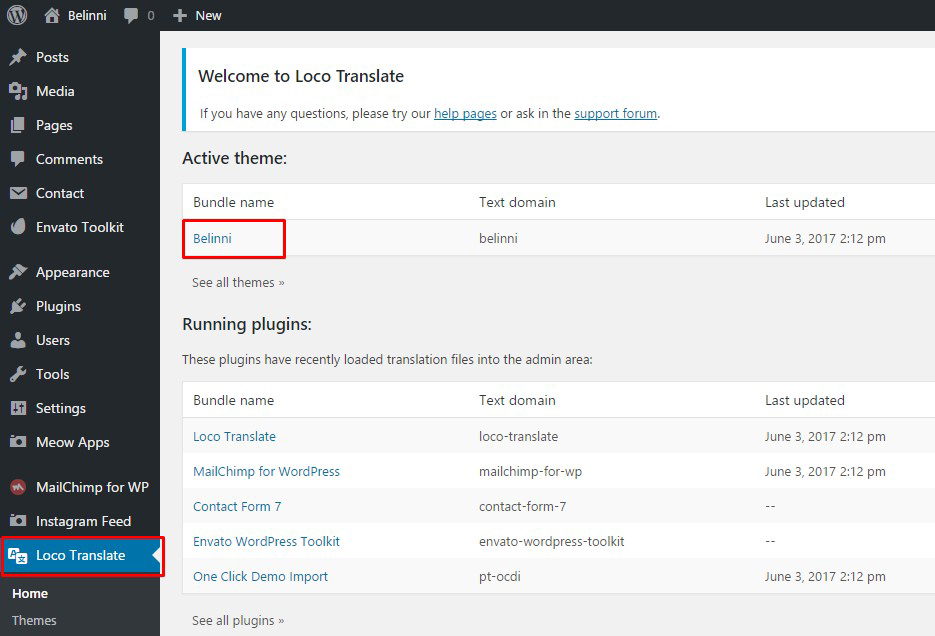
- After installing and activating go to Loco Translate section and choose in list your target theme/plugin and click on it.
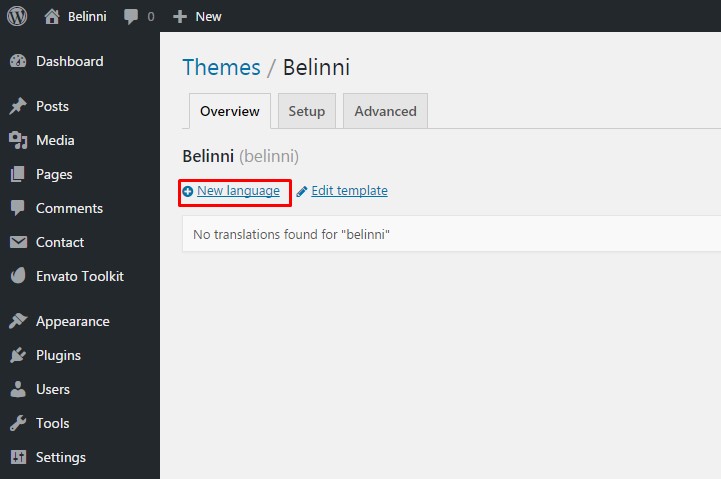
- In opened page click "New language"
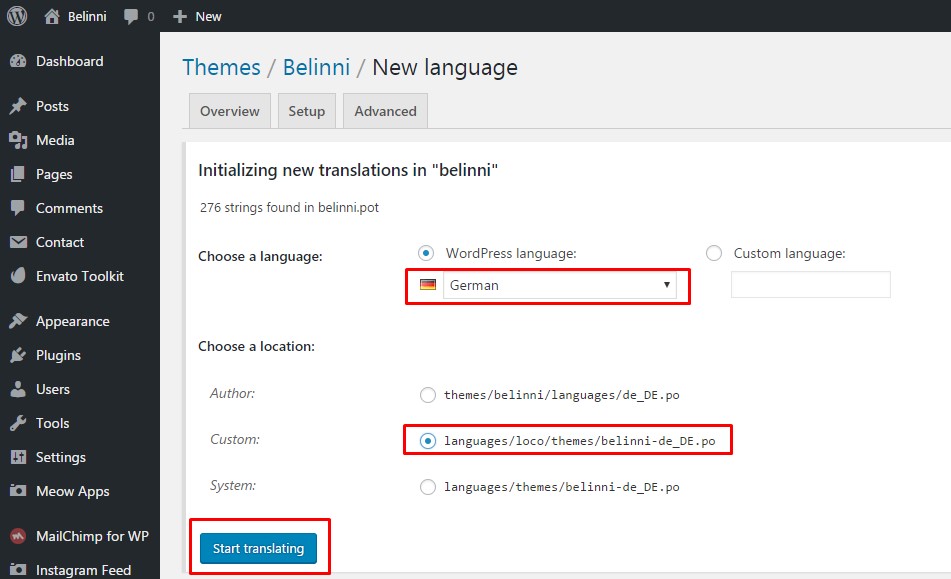
- Select your language (for example "German", code "de_DE") and click Start
translating
Note: To keep translations safe after future updates, always choose second location: languages/loco/themes/elemix-de_DE.po as shown in image below. All custom translations are stored in the wp-content/languages/loco/ directory so unless you reinstall the entire WordPress installation, all is safe in that folder. Without losing translations you can update the theme and any plugin. Even using the child theme is not mandatory.
 Note: this translation will be loaded only if your site language in WordPress Admin › Settings › General › Language is the same.
 - Translate all phrases and click Save to generate all necessary translation files.
Post management back to top
To start creating your first post, go to Posts > Add New from the admin panel
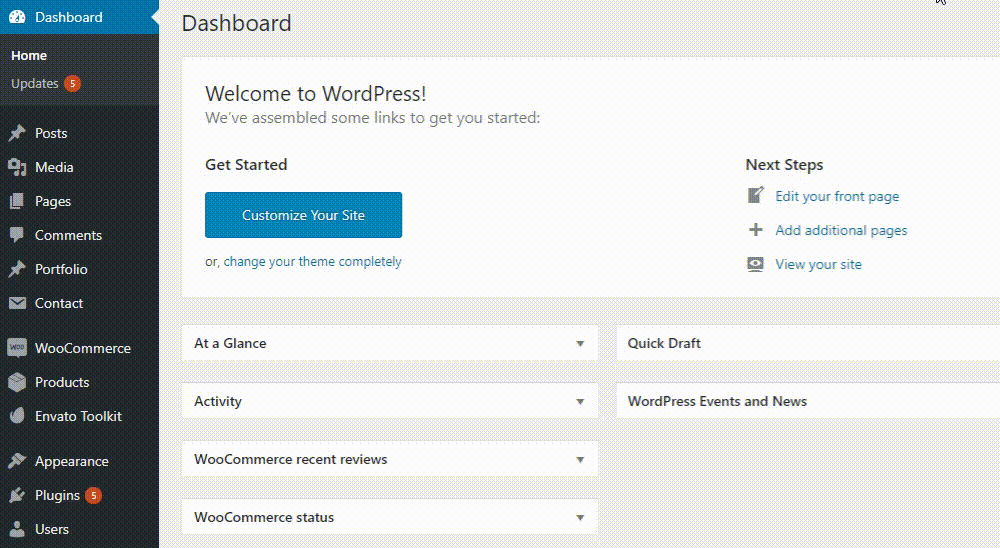
Page management back to top
To start creating your first page, go to Pages > Add New from the admin panel

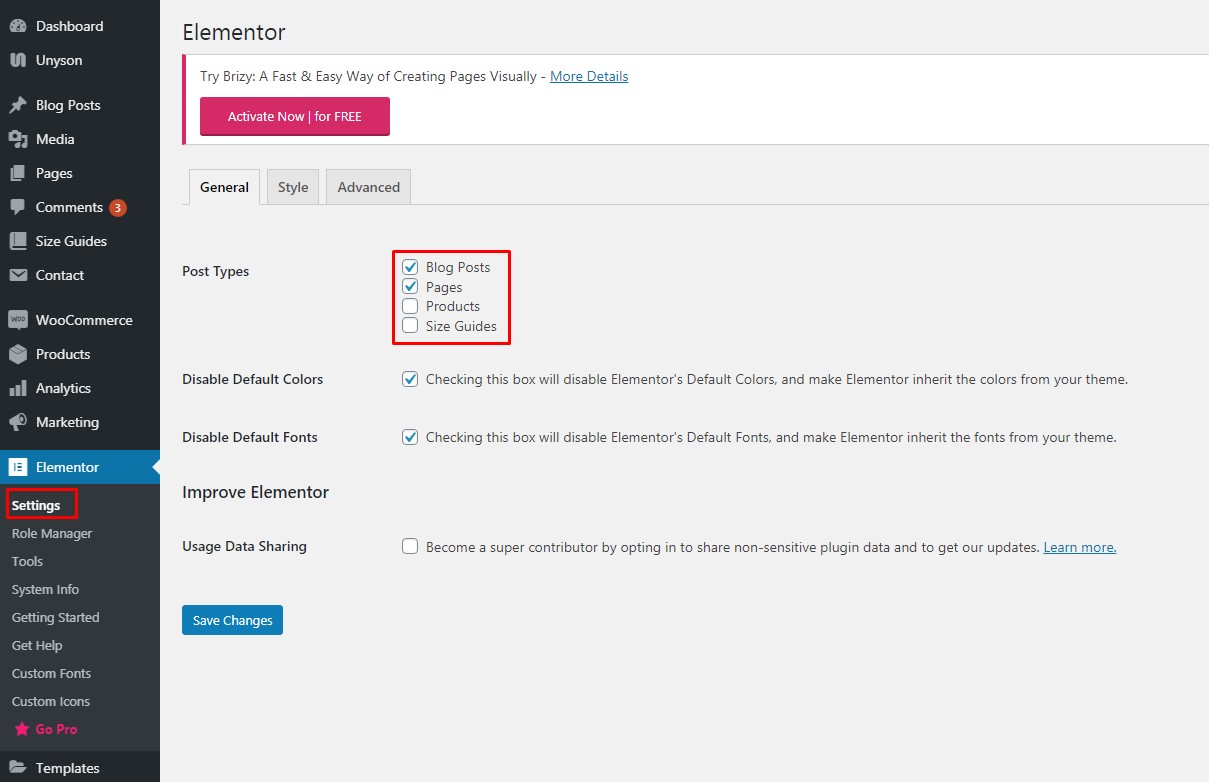
The Page Settings of your page edit screen offers loads of ways to customize the look and content of each page.
To do this, you need to edit the page with the Elementor and go to the tab as shown in the screenshot below:

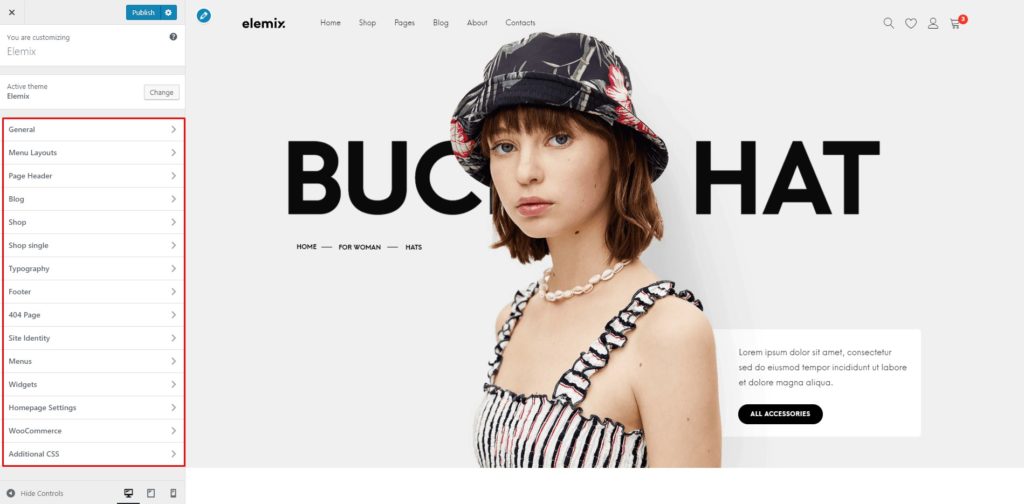
Customizer back to top
Elemix theme is fully customizable. Using the Options panel, you can change the layout, colors, background image, etc.
Elemix theme supports the WordPress Customizer. The Customizer is a framework for live-previewing any change to WordPress. It provides a simple and consistent interface for users to customize various aspects of their theme and their site, from colors and layouts to widgets, menus, and more. Themes and plugins alike can add custom options to the Customizer. The Customizer is the canonical way to add options to your theme.
To access the WordPress Customizer, log in to the WordPress Administration Panels and navigate to Appearance > Customize.
Menu management back to top
To start creating your menu, go to Appearance > Menu from the admin panel.
Mega Menu
If enabled, mega menus will display a list of recent posts with post thumbnails in the dropdown menu.
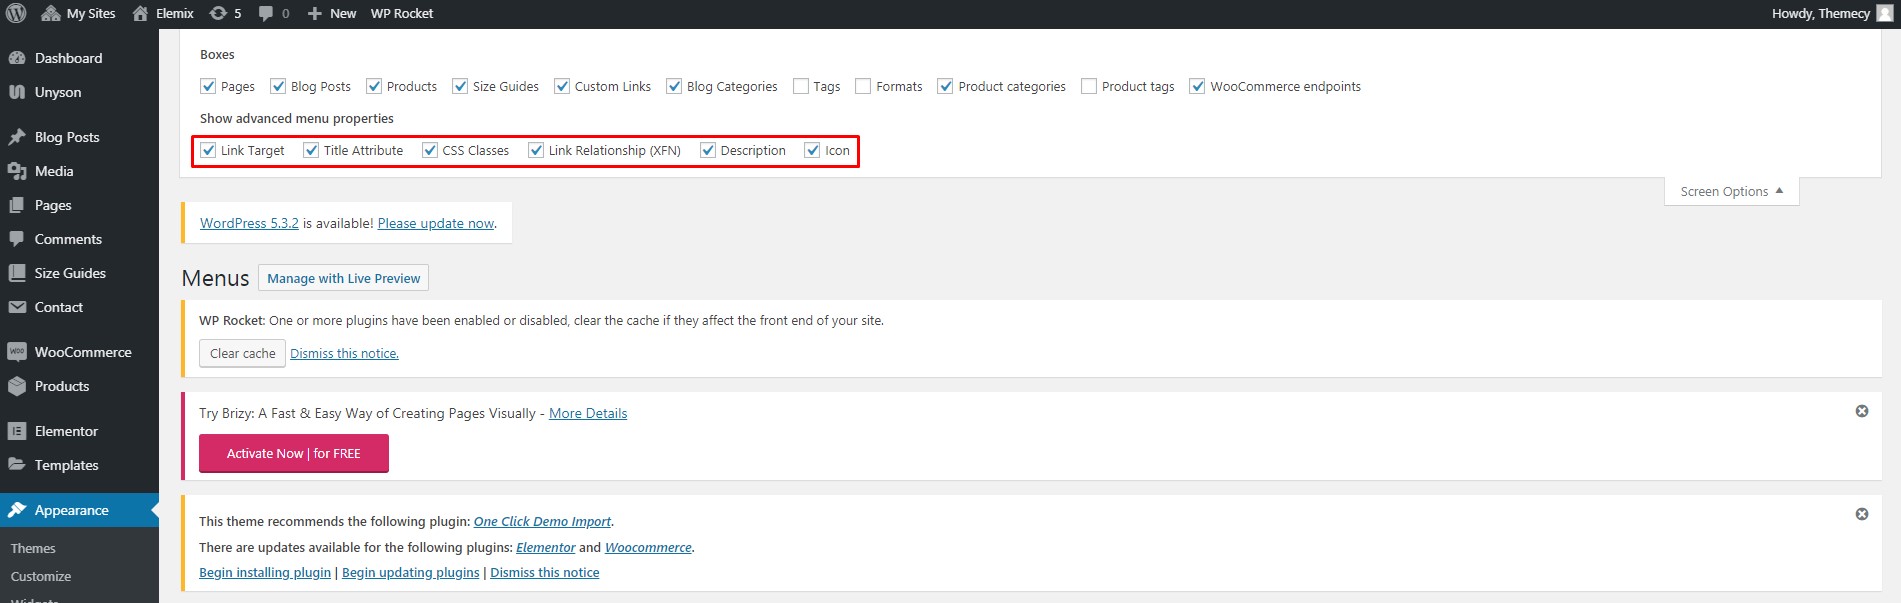
To enable Mega Menu go to Appearance → Menus and follow these steps:- Click on Screen Options in the top right corner of the screen.
- Make sure that the mega menu checkboxes is enabled.
- Activate the Use as Mega Men checkbox next to a parent menu element.
- Click Save Menu.
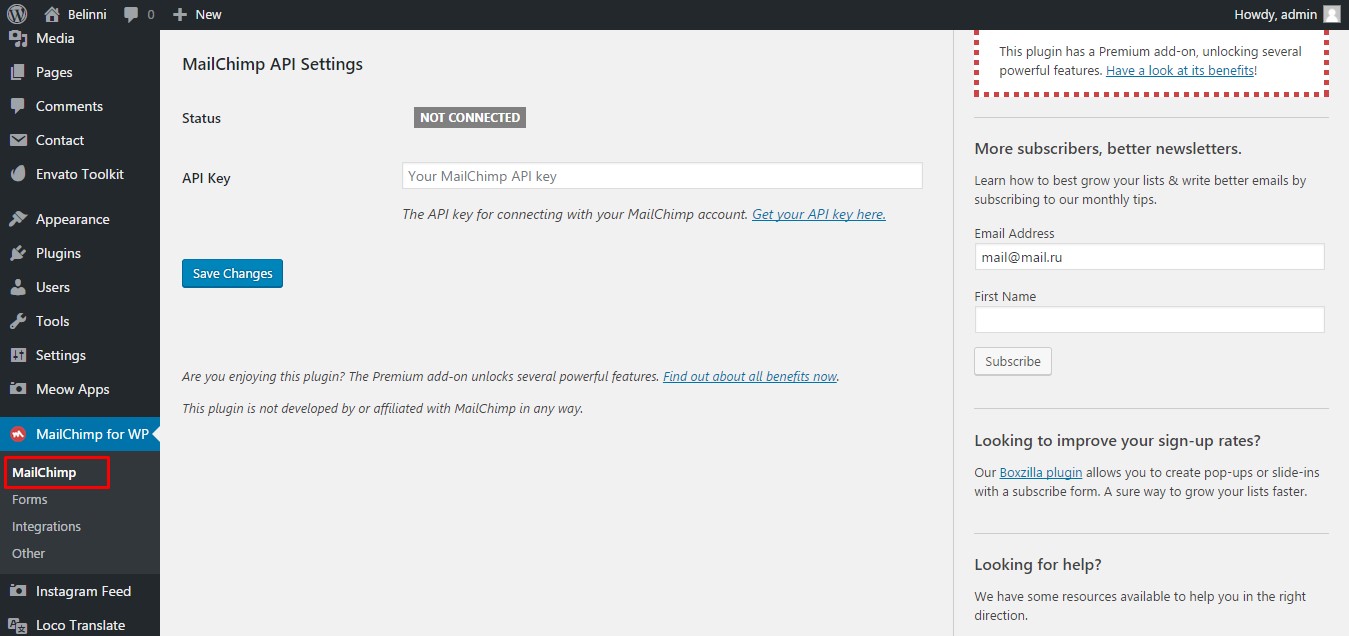
MailChimp for WordPress back to top
With this plugin you can subscribe your WordPress site visitors to your MailChimp lists, with ease.
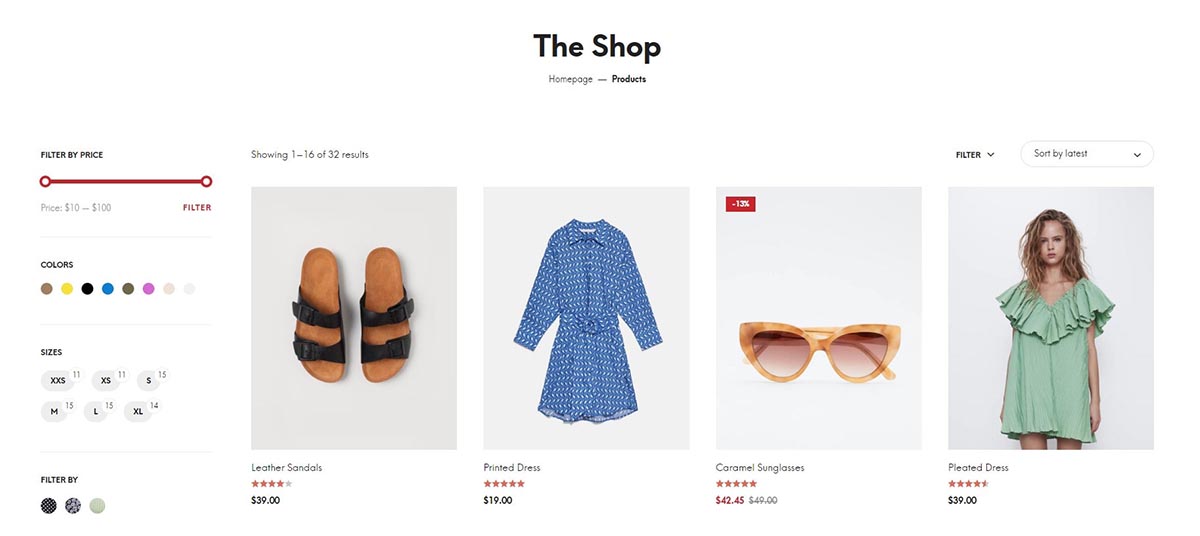
WooCommerce back to top
WooCommerce is a free eCommerce plugin that allows you to sell anything, beautifully. Built to integrate seamlessly with WordPress, WooCommerce is the world’s favorite eCommerce solution that gives both store owners and developers complete control.
Product Attributes
Go to the Products -> Attributes
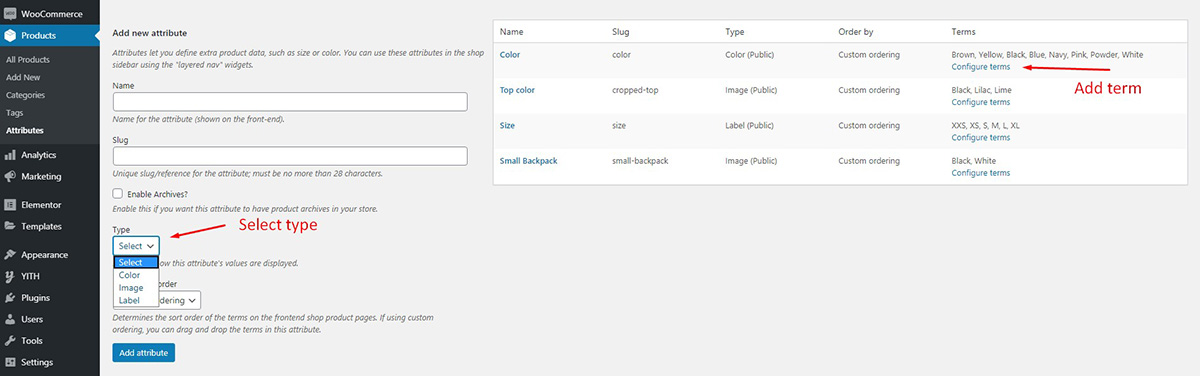
Then open the settings of your product and select the attributes that you want to use.

You can find more about it here.
Wishlist Settings
Settings of the Wishlist page that is used in our demo.
Yith -> WIshlist -> Whishlist Page Options
Elementor back to top
It’s about time for a live page builder, with no limits of design. A page builder that delivers high-end page designs and advanced capabilities, never before seen on WordPress.
If the editor does not start or you don’t see the edit button, check the checkboxes on the page Editor -> Settings.
The Elemix theme doesn't use the pro version features.
More about Pro
Documentation - How To Use Elementor
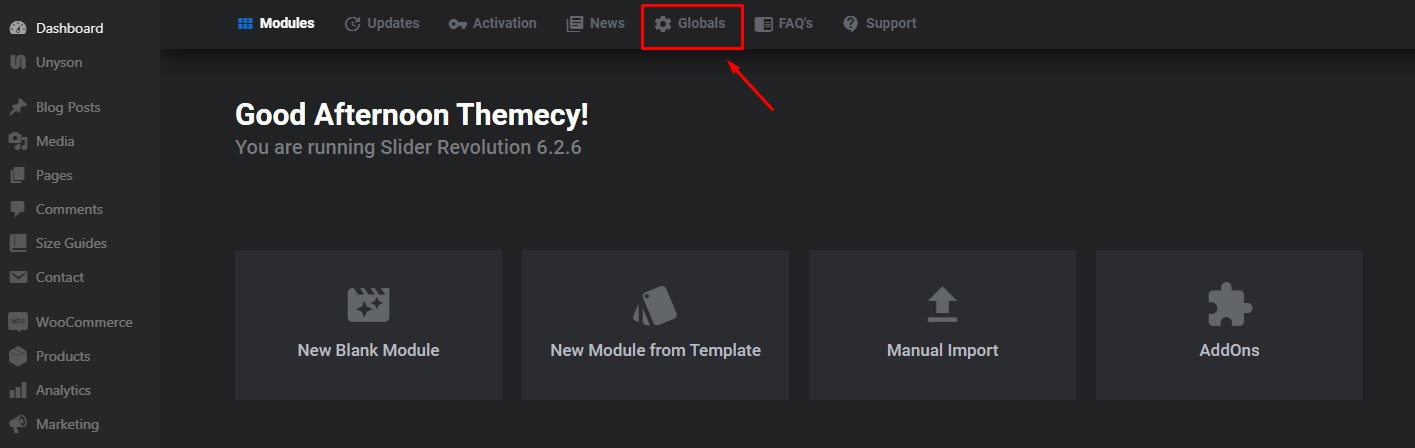
Slider Revolution back to top
To add a custom font go to the Slider Revolution -> Globals -> Edit Custom Font


Font Family Name: HansKendrick
Font CSS URL:
Available Font Weights: 200,300,400,500,600,700,800,900
Importing Data back to top
There are two ways to import content:
- Appearance -> Import Demo Data -> Import
- Manual:
- Open the elemix theme folder assets/demo/ and find the content.xml file
- In the admin panel follow to Tools -> Import
- Drag the content.xml file to import and press the Import button.
- Go to Appearance->Menus and activate all Display location checkboxes.
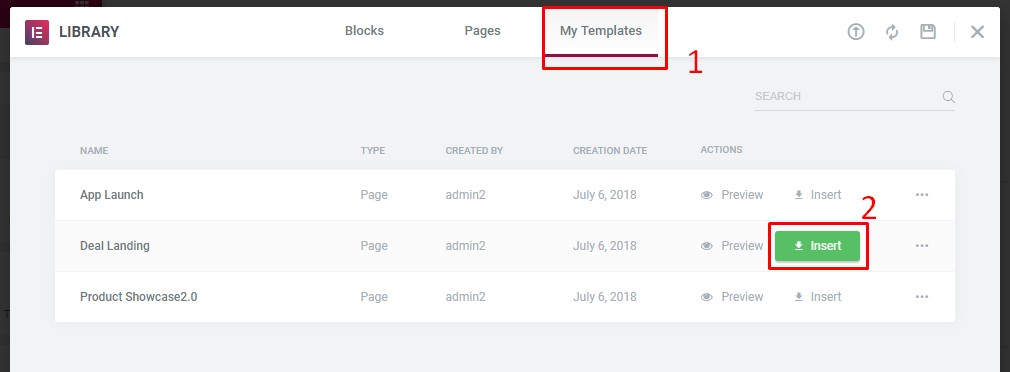
Elementor Importback to top
All templates should be imported during the basic installation of demo content, open the Library in the editor.


If the templates have not been imported, you can do it manually.
- Open the elemix theme folder assets/demo/ and find the PAGES folder
- Open your page with Elementor and upload file for import
- Use the files from the archive that we provide together with the theme:
demo-import / elementor / concepts

- Insert your template
Slider Revolution Importback to top
- Slider Revolution -> Manual Import -> Drag & Drop Import File (use import files from 'elemix theme folder -> assets/demo/SLIDERS)
Child Theme back to top
Child theme is for developers willing to make changes to core functions and code. If you are not planning to dig that deep, you can easily skip this chapter.
In the theme pack you will see materials for the child theme. It’s located in the "elemix-child.zip" archive. You can install the child theme the same way as you install the main theme (see above in the section "Install theme")
A few recommendations on how to use Child Theme from Elemix Theme:
- Almost all files from the main theme can be replaced in the theme. It doesn’t concern only .php-files with templates and basic logics, but also both .js, .css files from respective folders and files with images, icons etc..
- If you want to change some of the theme’s functions or to add new ones, you need to create file 'functions.php' in the folder "elemix-child", and add all required functions into it. If our theme contains functions with such names, they will be replaced with yours, if not – your functions will complete our theme’s logics.
- As for other files - put out templates from the folder 'framework/templates' ( maintaining files hierarchy ), images from the folder 'images' etc. - to make changes, copy theme into the folder 'child theme' and make changes there.
Speed Up Your Website back to top
Our theme created for very fast and effective work, with correct server configuration and content optimization you can get 85-90 / 100 score in Google PageSpeed Insights test.
Site speed depends on several things in addition to theme (that already coded for extra fast work), like WordPress configuration, Server configuration and quality and Content optimization. We included simple guide how to optimize your website for extra fast work with our theme.
Useful advices for site Speed Up:- Make sure that you have good hosting/server
- Disable all third-party plugins that you does not use
- Check this official WordPress Optimization guide article and external article links in it. Follow all guides in it (especialy image optimization, server setup and optimization)
Sources and Credits back to top
Images
Fonts
In the theme there are used two Google Web Fonts Open Sans and Rubik by default. But you can use any font from google fonts collection from option panel.
Support and Feedback back to top
If you have any feedback or suggestions please let us know via contact form.
How to Rate back to top
Go to Themeforest and follow the image instructions

Don't forget that your feedback motivates us and helps us to work even harder on our products.
